
Blog
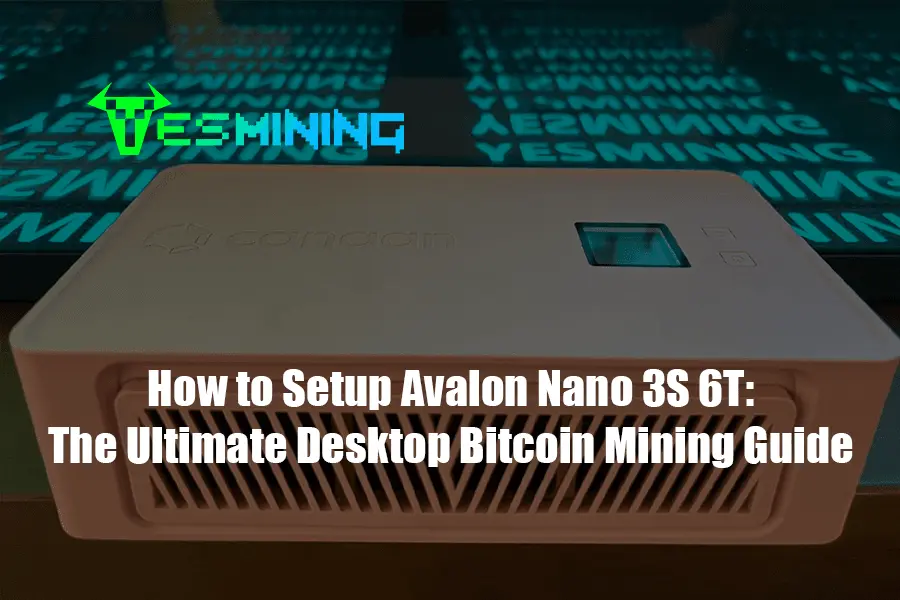
In the world of cryptocurrency mining, the barrier to entry has traditionally been high—noise, heat, and complex industrial setups. However, the Avalon Nano 3S 6T by Canaan has disrupted this narrative. As a portable, stylish, and efficient USB-C powered miner, it transforms Bitcoin mining from an industrial process into a household convenience.
Whether you are a hobbyist looking to learn the ropes or an enthusiast seeking supplemental heating with a financial upside, this guide provides a step-by-step technical walkthrough to setting up your Nano 3S.
Table of Contents
1. Avalon Nano 3S Technical Specifications
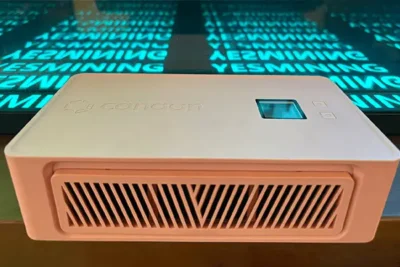
Before diving into the setup, it is crucial to understand the engineering behind the device. The Avalon Nano 3S is not just a toy; it is a specialized ASIC miner designed for the SHA-256 algorithm.
| Feature | Specification |
|---|---|
| Hashrate | Up to 6 TH/s (±10%) |
| Power Consumption | ~140W (Standard Mode) / ~110W (Silent) |
| Power Supply | Requires 140W PD 3.1 USB-C Charger |
| Noise Level | < 35dB (Silent Mode) |
| Dimensions | 204mm x 115mm x 45mm |
For high-performance results, we recommend purchasing the verified unit directly from reputable vendors. You can buy the Canaan Avalon Nano 3S 6T here to ensure you receive the latest hardware revision.
2. Unboxing & Hardware Requirements
The Nano 3S is lauded for its “plug-and-play” capability, but you must ensure your power environment is stable.
What’s in the Box?
- Avalon Nano 3S Device
- USB-C to USB-C High-Wattage Cable
- Quick Start Manual
Critical Power Note
The Nano 3S is highly sensitive to power input. To reach the full 6 TH/s hashrate, you must use a power adapter that supports PD 3.1 140W. Using a standard phone charger will result in the device failing to initialize or running at a severely diminished hashrate.
3. Connecting to the Network (Step-by-Step)
The device operates via Wi-Fi, allowing you to place it anywhere in your home or office. Follow these steps for the initial handshake:
- Power On: Connect your Nano 3S to the 140W power adapter. The LED indicator will begin to flash.
- Enter AP Mode: Use your smartphone or laptop to search for available Wi-Fi networks. Look for a network named
Avalon-Nano-XXXX. - Access Management Portal: Open a web browser and enter the default IP address:
192.168.0.1. - Connect to Home Wi-Fi: Inside the dashboard, navigate to the “Network” tab. Select your home Wi-Fi SSID and enter your password. Once saved, the device will reboot and join your local network.
4. Mining Pool Configuration & Optimization
To earn Bitcoin, you must join a “Mining Pool.” This combines your hashrate with others to increase the frequency of payouts.
Recommended Pools
- F2Pool: Reliable and easy-to-use interface.
- AntPool: One of the largest and most secure pools.
- Luxor: Ideal for those who want advanced hashrate analytics.
Setting the Stratum Address
In the Avalon Management Dashboard, go to the “Miner Configuration” section. You will need to enter the following:
- URL: The stratum address provided by your pool (e.g.,
stratum+tcp://btc.f2pool.com:3333). - Worker:
YourWalletAddress.WorkerName - Password: Usually
123orx.
- URL: The stratum address provided by your pool (e.g.,
5. Utilizing the Dual-Function (Mining & Heating)
One of the unique selling points of the Avalon Nano 3S is its ability to act as a stylish desk heater. During winter months, the 140W output provides a gentle warmth, effectively making your heating “profitable.”
You can toggle between High Performance Mode (6 TH/s) and Silent Mode. Silent mode reduces the fan speed significantly, making it quiet enough for a bedroom or office setting while still contributing to the Bitcoin network’s security.
6. Expert Troubleshooting
Hashrate is lower than 6 TH/s?
This is almost always due to the power supply. Ensure your PD adapter is truly 140W. Additionally, check the ambient temperature; ASICs will throttle performance if they exceed safe thermal limits.
Device keeps disconnecting from Wi-Fi?
The Nano 3S has a compact internal antenna. Ensure it is within a reasonable distance of your router or use a Wi-Fi extender if mining in a basement or garage.
Is it profitable?
At 6 TH/s, the Nano 3S is designed for “lottery mining” or hobbyist learning. While it generates BTC daily, its primary value lies in its dual-use as a heater and its high resale value as a collector’s item in the mining community.
Ready to Start Your Mining Journey?
Don’t settle for unverified hardware. Secure your high-performance unit today.
7. Where to Buy & Next Steps
Setting up the Avalon Nano 3S 6T is a rewarding experience that bridges the gap between complex crypto-infrastructure and consumer electronics. By following this guide, you have transformed a small device into a decentralized powerhouse.
If you are looking to scale your mining operation or explore other hardware like the Antminer or Whatsminer series, browse our full collection.


 Bitdeer
 Bitmain
 BOMBAX
 DragonBall
 Elphapex
 Fluminer
 Goldshell
 iBelink
 Iceriver
 Ipollo
 Jasminer
 Volcminer
 Aleo Miner